Alright so I am going to turn over a new leaf, as some say, and I am going to *attempt* to plan out meals. Not that I don't enjoy running to the grocery store or nearest Super Target as the oven preheats to grab those couple ingredients I didn't bother to check on beforehand. I always wonder if the cashier is thinking "Hmm wonder what y'all are having tonight" as my jars of marinara, couple of onions, and loaf of garlic bread go sliding down the.....conveyer belt? What is the name for that slidey thing - is it really just a mini conveyer belt? If someone knows the name please tell me. Oh dear, I just got the feeling that it is super obvious and everyone knows but it temporarily slipped my mind. Oh well, moving on. I figured if I posted our plan it would keep me slightly more accountable...maybe. Click on the meal below and it will lead you to the original recipe!
Monday: Mini Meatball Sandwiches
Tuesday: Stuffed Mexican Chicken Shells
Wednesday: BBQ Beer Chicken
Thursday: Oven Baked Tacos - these are so good I have to resist making them every single week!
Friday: Hopefully convince my hopefully-not-too-tired husband to go out somewhere! If not, there's always a good PB&J :)
If y'all have a good recipe, pass it along! Happy Monday!

Showing posts with label Crockpot. Show all posts
Showing posts with label Crockpot. Show all posts
Monday, April 29, 2013
Monday, November 19, 2012
Turkey Break
Psalm 100:4 "Enter His gates with thanksgiving and His courts with praise; give thanks to Him and praise His name. For the Lord is good and His love endures forever; His faithfulness continues through all generations."


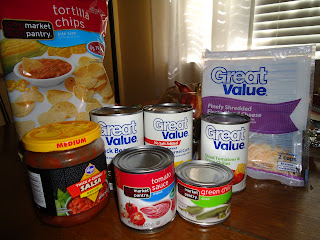
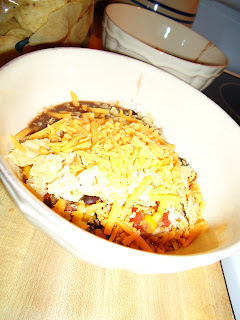
Crock Pot Chicken Taco Chili
From: http://www.skinnytaste.com/2008/11/crock-pot-chicken-taco-chili-4-pts.html
1 onion, chopped
1 16-oz. can black beans
1 16-oz. can kidney beans
1 8-oz. can tomato sauce
10 oz package frozen corn (I used a can)
2 14.5-oz. cans Rotel
1 packet taco seasoning
1 Tbsp cumin
1 Tbsp chili powder
3-4 boneless chicken breasts
Chili peppers, chopped (optional)
1/4 cup chopped fresh cilantro (I omitted)
Combine all ingredients (except chicken and cilantro) in the bottom of your crock pot. Place chicken breasts on top. Cook on low for 10 hours or high for 6 hours (my crock pot runs hot I think and it did not take me nearly this long). Half an hour before serving remove chicken and shred. Return to pot and stir in. Top with fresh cilantro....or a mountain of cheese and crushed tortilla chips like we did!

I am at the same time amazed and astounded that we are entering Thanksgiving Week! With only two and a half days of school this week I know it is going to fly by! One of my boys asked me if we would have to clean out our desks before we go on "Turkey Break"...so cute! And yes, your desk is like a black hole where pencil shavings, goldfish, unfinished papers, random assortment of trash, and who-knows-what-else go to die...not so cute! Here's a quick catch up of just a few of the things we have been doing recently...
In math we've been talking about skip counting and they made these precious ten frame skip counting turkeys. Believe it or not the orange one below, complete with the fabulous long eyelashes, was created by one of my boys! He wanted to make a girl turkey and was kind enough to supply her with the lashes every girl desires.


Previously in math we had been studying patterns. They made some really cute pattern turkeys using four different kinds of patterns on the feathers but unfortunately I forgot to snap a pic. We also reviewed patterns using Sweetarts. There's no better way to get them excited for math than to pump them full of sugar at 9:00 in the morning! They had to use their sweetarts to create different patterns then record them using corresponding colored pencils.


We've also been super busy traveling the world in our history unit. The kids have been learning about different countries all over the world and recording a fact about the country and the flag in a passport (it actually looks like a real passport complete with their picture and info). To help with the concept of directions and maps we read "Rosie's Walk" and made these Rosie's with directional words...

We also made these awesome maps that made them totally understand concepts of state vs. country vs. continent. All along our traveling unit they would ask, "When are we going to study Texas?" Texas is a state, not a country. "When are we going to study Austin?" Austin is a city, not a country. Before we started I found our school on Google Earth. Then we slowly zoomed out so they could see our school, street, city, state, country, continent, world. Then we zoomed back in....all these concepts totally clicked! Then we started on our time-consuming projects...but it was definitely worth the time and effort! We started small and worked our way out, beginning with our school. The kids drew pics of our school, street, and different symbols of Texas. For the country, continent, and planet layers I supplied a little map for them to glue on and label. Sorry about the photo quality...


After we'd been traveling to all different countries, I decided that we would establish our own country. First we had to brainstorm everything a country would need. I was amazed at some of the actually realistic ideas they had! Transportation, money, stores, roads, etc. This was a really great time to stretch their brains and really make them aware of so many parts of our country and how it is run. It also hit a ton of Social Studies standards that are sometimes tricky to fit in. From there we had to name our country. To practice voting, we created our list of names and took an anonymous vote. Surprise, surprise, our country was named Aggie. That's what I get for living in Aggieland! Although, "Sebestaland" was a close second :) Then I put the kids on four different committees: the Flag Committee, National Symbols Committee, Rules and Laws Committee , and Leadership Committee. I love some of the rules and qualifications of a leader they brainstormed! It was a really neat time too because every committee member had to agree on whatever they were working on before putting it on the paper. Since creating our country we've also talked a lot about goods and services (the kids made "Goods Road" and "Services Street" to put in our country) and needs and wants. Needs and wants came at a perfect time as we focus on being thankful around this time of year!


Finally, to prepare for our Thanksgiving party on Wednesday, we made these "I am thankful for..." placemats that will be laminated and set out on their desks. I set out pre-cut turkey bodies (which James pointed out looked like a drumstick when turned on its side) and all different scrapbook and construction papers. The kids had free reign in creating their turkeys and I love how different they all turned out! It was so cute to see their creativity shine. Some kids really went all out but I thought this little guy was so precious and simple....

Happy Thanksgiving!
Wednesday, April 11, 2012
Sow in Peace
James 3:17 "But the wisdom that comes from heaven is first of all pure; then peace-loving, considerate, submissive, full of mercy and good fruit, impartial and sincere. Peacemakers who sow in peace raise a harvest of righteousness". Doesn't this verse just some up every attribute we would like to possess?? Let this be our daily reminder of the power of God and the transformation of our hearts that only He can accomplish. If we ask, according to His will, we will receive. Therefore we can walk through our days with purity and peace, being considerate, submissive, merciful, sincere, and impartial to all those we encounter. What better way than to show people the love of Jesus than with the wisdom that can only come from our Heavenly Father!


Crockpot Santa Fe Chicken
1 1/2 lbs chicken breast
14.4 oz can Rotel
15 oz can black beans
8 oz frozen corn (I just had canned so I stirred it in for the last few minutes to heat through)
1/4 cup chopped fresh cilantro (I omitted)
14.4 oz can chicken broth
3 scallions chopped
1 tsp garlic powder
1 tsp onion powder
1 tsp cumin
1 tsp cayenne pepper (to taste...I used this amount and it was pretty spicy)
Salt to taste
1. Combine chicken broth, beans, corn (if frozen), Rotel, cilantro, scallions, garlic powder, onion powder, cumin, cayenne, and salt in bottom of crock pot.
2. Season chicken breasts with salt and lay on top.
3. Cook on low for 10 hours or on high for 6 hours. Half an hour before serving, remove chicken and shred. Return to crock pot and stir in. (I added a scoop of sour cream and stirred it in at this point to make it super creamy. Adjust salt and seasonings if needed.
4. Serve over rice, in a tortilla, or on top of chips!
This was an absolute winner for the two of us and I want to make it about every week or so. And I love not having to do anything for dinner when I get home from work other than lifting a fork!

--------------------------------
Three Cheese Manicotti
From: Family recipe
2 cups mozzarella cheese, shredded, divided
1 cup light ricotta cheese
1/2 cup parmesan cheese, grated
2 eggs, beaten
1/2 tsp salt
1/8 tsp pepper
1 tsp fresh parsley, chopped
8 manicotti shells, cooked to package directions
2 cups spaghetti sauce
1. In large bowl, combine 1 cup mozzarella cheese, ricotta, parmesan, eggs, salt, pepper,
and parsley. Stir gently.
2. Stuff cooked manicotti shells with cheese mixture.
3. Pour 1/2 cup of sauce in bottom of 2 quart casserole.
4. Arrange shells on top, pour rest of sauce over manicotti.
5. Sprinkle with remaining cheese.
6. Bake uncovered at 350 for 25-30 minutes or until bubbly.

Enjoy!
Tuesday, December 13, 2011
I got love in my tummy!
Isaiah 9:6 "For to us a child is born, to us a son is given, and the government will be on his shoulders. And he will be called Wonderful Counselor, Mighty God, Everlasting Father, Prince of Peace." We are governed by the most amazing ruler. Our Wonderful Counselor guides us through all of life's mountains and valleys, never leaving us forgotten or forsaken. Our Mighty God is so powerful that He spoke everything we see into existence with one breath, and not even a sparrow can fall out of the sky without His knowledge. Our Everlasting Father, who always was, is, and will be, eagerly awaits our reunion with Him in Heaven where we get to spend eternity blissfully praising and glorifying Him. Our Prince of Peace comforts us and wipes every tear away, for He knows the very number of hairs on our heads and cares for us so deeply we cannot humanly comprehend it. How awesome is He??
Crock Pot Chicken Pot Pie
From: www.creationsbykara.com (found through Pinterest)
*This is the halved version and it made enough to feed at least 3-4 people:
2 potatoes, scrubbed, peeled and diced
1 1/2-2 cups baby carrots, halved (I just chopped my whole carrots into small, thin pieces)
1/2 onion, diced
1 clove garlic, minced
1/2 tsp salt
Pepper to taste
*I added a sprinkle of oregano, parsley, and rosemary
2 boneless skinless chicken breasts, cut into bite-sized pieces
1 can cream of chicken soup
1/2-1 cup frozen peas
Biscuits, toast, or pie crust (I chose to make mini pie crusts, recipe to follow)
1. Place all of veggies in bottom of crockpot. Sprinkle with salt and pepper (and additional seasonings if you so choose).
2. Place raw chicken on top of veggies and cover with soup.
3. Cover and cook on low for 4-5 hours.
*Mine was ready in about 3 hours, but I think my crock pot runs hotter than some in the recipes I find. You might need to adjust according to your personal pot :)
4. Add frozen peas and cook 20 minutes longer or until heated through. (In this last step I added a little bit of butter and let it melt through, just to put it over the edge).
5. Serve over toast, biscuits, or pie crust.
Pie crust all the way baby!!!!
Pie Crust
From: my grandma (aka the world's best pie maker...ever. I'm serious.)
*I halved this recipe and made 5 little pie crust "bowls" in a jumbo muffin tin. Sounds like an oxymoron? It all depends on your point of reference :) This is the original version for 2 pie crusts:
2 cups of flour, sifted
1 tsp salt
2/3 cup shortening + 2 Tbsp
*Of course, I didn't make sure I had Crisco before beginning this dinner endeavor. However, I did find some butter-flavored Crisco sticks in the back of the pantry. Oh my goodness, did it make this crust buttery! But the original is still super flaky and buttery....all that a good crust should be. I should warn you, my family and I are pie snobs. Anyhoo...back to the recipe..
1/4 cup water
1. Combine sifted flour and salt.
2. Cut in shortening until uniform.
3. Sprinkle with water 1 Tbsp at a time.
4. Toss with fork.
5. Divide into halves and make shell and top.
Pretty easy, right? I rolled mine out and cut super UN-uniform pieces to lay down in my jumbo muffin pan. Seriously, I thought there was no way these would come out right. And of course, I didn't write down the cooking time when I got this recipe from my mom forever ago so I estimated. For my halved version (5 pie cups), I baked them at 400 degrees for about 17 minutes. I really just picked a low cooking time, kept my eye on them, and kept baking them til they were the delectable light golden brown. Although oddly-shaped, oh my goodness, these pie cups turned out so good! Be sure to spray your muffin pan super well so they just pop out. I spooned a heaping of the chicken pot pie filling in each one and went for it. I wasn't sure how it would all come together but I'm pretty sure James might ask for this every week. He even told me this recipe was blog-worthy haha! The rich filling combined with the salty, flaky crust is just to die for. And a chicken pot pie without any heavy cream? Bingo!

I apologize for the quality of this pic. My camera is still out (but hopefully will be fixed soon!) so I had to resort to my husband's phone camera.
I found this next recipe on Pinterest and tweaked it a bit. It seems like every recipe for pasta with any type of sauce calls for heavy whipping cream which A) I never have and B) has a ton of calories. I decided to modify and use the base of the sauce that I use for the mac n' cheese recipe I've posted on here before. OH MY GOODNESS. It made just enough for James and I to eat our fill but I SO wish it had made more 'cause I would take it for lunch every day. Had just the right amount of kick (James added red pepper flakes before trying his and it was a bit hot haha) and creamy cheesy yumminess. I highly recommend this plus it is a cinch to make.
Cajun Chicken Pasta
From: www.plainchicken.com (found on Pinterest) + tweaks4 oz linguine
2 boneless skinless chicken breasts, cut into bite-sized pieces
2 tsp cajun seasoning
2 green onions, finely chopped
2 Tbsp butter
2 Tbsp flour
1 cup milk
1/4 tsp salt
1/4 dried basil
1/8 tsp pepper
1/8 tsp garlic powder or fresh minced garlic (I used fresh)
1/2 cup (plus a little extra if you love cheese like me) shredded mixed Italian cheeses (I used Great Value Italian style, finely shredded)
Parmesan cheese to top
1. Boil pasta according to package directions.
2. Place chicken and cajun seasoning in bowl, toss to coat.
3. Spray skillet with non-stick spray and heat over medium heat. Saute chicken until tender, about 5-7 minutes.
4. Reduce heat and add green onions.
5. In saucepan, melt butter over medium-low heat. Add flour and stir until smooth and bubbly.
6. Very slowly (this is the key to thick sauce!!!) add milk and stir until thick. Add salt, pepper, basil and garlic and continue to stir and thicken.
7. Add Italian cheese and stir until melted.
8. Add chicken and green onions to hot, drained pasta. Toss with sauce and top with parmesan cheese.
After one bite I told James he would be happy he married me haha! It would be even better with some buttery bread to soak up the leftover sauce in your bowl. That is....if you don't lick it clean like we did....
I wanted to give my students and their families a little gift this holiday season that they could all enjoy and that wouldn't break the bank. I knew exactly what I wanted to give....homemade hot chocolate mix! We made this every winter when I was younger and I would literally drink at least one cup a day. It is the perfect sweetness and dissolves completely, unlike some of the store-bought stuff that leaves chocolate gook at the bottom of your mug. This just simply will not do. I plan on getting some cheap, cute Christmas tins at the Dollar Tree and packaging them up to send home of Friday. If there is any left of course! Oh and just FYI, this recipe makes A TON of hot chocolate powder. Beware. But that just means this is a hot cocoa that encourages the giving spirit! You will have so much you can't help but give it away!!
Homemade Hot Chocolate Mix
From: my mom
9.6 oz powdered dry milk
22 oz (or around there) powdered Coffee Mate
2 lbs powdered sugar
2 lbs chocolate Nesquick
(I couldn't find a two pound container so I bought the one closest to this ballpark estimate. I think it was 37 oz or something like that. You really can't mess this recipe up as long as you get close)
1 tsp salt
1. Mix all ingredients together. Mix, mix, mix, then mix some more until it is all uniform.
**I highly suggest mixing in the biggest tub or container you have (I used my big chili soup pot) and mix outside. Or else you will have a cloud of stickiness descend on every surface in your kitchen.
2. Mix 1/4 cup of hot chocolate with 1 cup of hot water.
3. Sip and enjoy the holiday season!
Sunday, November 6, 2011
Give me something good to eat!
Psalm 116:7 "Be at rest once more, O my soul, for the Lord has been good to you." In the hustle, bustle, and sometimes chaos of life it can be so easy to forget this simple yet forever constant fact - the Lord has been good to you. He is with you in every situation, circumstance, trial, trouble, and joy of daily life. How is he good? He sent His holy and perfect son to die on the cross in our rightful place for our sins, forever removing every stain and blemish by his powerful blood and presenting us white as snow to his Father. Be at rest today and always. The Lord has been oh-so-good to you.
To celebrate Halloween without directly celebrating Halloween at school, we learned about owls, bats, spiders and other nocturnal things this week, in addition to having a fall party. The kids were obsessed with the giant books showing all kinds of creepy, crawly photographs. We made our own spiders out of styrofoam balls, pipe cleaners, and googly eyes. After reading a book about how spiders had 8 eyes and 8 legs, we set to work creating our own. 8 tiny googly eyes plus 8 pipe cleaner pieces plus paint plus glue equals one giant mess! One of the other teachers commented that my little cowboy looked like he just got done working on a car with all the black paint smeared down his button-down and jeans. But hey, learning is often messy, especially with this age! The spiders turned out so cute...legs and eyes literally poking out all over the place. If we wanted to be super anatomically correct we would have used two styrofoam balls per kid since we learned that spiders' bodies have two parts but they say hindsight is 20/20. The kids also made owls on construction paper. They dipped their palms in paint and (were supposed to) put their fingers all together to make the body (palm is head, fingers at bottom are talons...you see where I'm headed?) We need to work on our understanding of positional words I think since the more I told them to put their fingers together the farther they strained to get their little fingers as far apart as possible haha! Then they dipped their hands in paint again and, with fingers intentionally spread this time, made the wings. Then came the GIANT googly eyes and a paper beak. Then finally, glue and feathers of all different crazy colors. It was hilarious. One of my boys literally but one feather on each wing and one on the body and called it a day. One of my girls put so many feathers on hers you couldn't even see the ginormous eyes. My favorites had to be the ones that glued everything, feathers, eyes, and beak, in the space around the painted body. So cute!!
We went to a little Halloween get-together with a group of my husband's friends and I volunteered to be the sweets-provider. I got this recipe from my aunt, tweaked it slightly most wonderful, most moist (moistest?) dessert that rocked our worlds. Wait for it......Reese's Pieces Cupcakes!! I'll give you a sneak peak at what will get you drooling with three little words...peanut butter buttercream. My aunt's original recipe was for peanut butter cup cupcakes but I was out of some of the ingredients so I improvised. Is your mouth watering in anticipation yet?? And yes, this cupcake is also known as the "death to all diets" but they say it's all about moderation. Therefore, have your cupcake and engulf it too :)

I found this next recipe on my new obsession....PINTEREST! It came from a blog (crockpot365.blogspot.com) where a woman used her crockpot every day for a year! Now that is true commitment. And a great resource for us crockpot users (there's just something about coming home to a meal magically cooked and ready by a small, shiny machine). It's almost like having my own Rosey.
The Lord provided us with a nice little taste of cold fall weather this week so we were definitely in the mood for warm food. I got this recipe off of Pinterest as well, originally from howto-simplify.com. When they say simple they mean it! So easy to prepare and so flavorful. I took the leftovers to work and was in heaven...could even ignore the havoc that was being wrecked by the small children surrounding me. Actually I had to fend for my chili as they all wanted to stir it for me haha!
To celebrate Halloween without directly celebrating Halloween at school, we learned about owls, bats, spiders and other nocturnal things this week, in addition to having a fall party. The kids were obsessed with the giant books showing all kinds of creepy, crawly photographs. We made our own spiders out of styrofoam balls, pipe cleaners, and googly eyes. After reading a book about how spiders had 8 eyes and 8 legs, we set to work creating our own. 8 tiny googly eyes plus 8 pipe cleaner pieces plus paint plus glue equals one giant mess! One of the other teachers commented that my little cowboy looked like he just got done working on a car with all the black paint smeared down his button-down and jeans. But hey, learning is often messy, especially with this age! The spiders turned out so cute...legs and eyes literally poking out all over the place. If we wanted to be super anatomically correct we would have used two styrofoam balls per kid since we learned that spiders' bodies have two parts but they say hindsight is 20/20. The kids also made owls on construction paper. They dipped their palms in paint and (were supposed to) put their fingers all together to make the body (palm is head, fingers at bottom are talons...you see where I'm headed?) We need to work on our understanding of positional words I think since the more I told them to put their fingers together the farther they strained to get their little fingers as far apart as possible haha! Then they dipped their hands in paint again and, with fingers intentionally spread this time, made the wings. Then came the GIANT googly eyes and a paper beak. Then finally, glue and feathers of all different crazy colors. It was hilarious. One of my boys literally but one feather on each wing and one on the body and called it a day. One of my girls put so many feathers on hers you couldn't even see the ginormous eyes. My favorites had to be the ones that glued everything, feathers, eyes, and beak, in the space around the painted body. So cute!!
We went to a little Halloween get-together with a group of my husband's friends and I volunteered to be the sweets-provider. I got this recipe from my aunt, tweaked it slightly most wonderful, most moist (moistest?) dessert that rocked our worlds. Wait for it......Reese's Pieces Cupcakes!! I'll give you a sneak peak at what will get you drooling with three little words...peanut butter buttercream. My aunt's original recipe was for peanut butter cup cupcakes but I was out of some of the ingredients so I improvised. Is your mouth watering in anticipation yet?? And yes, this cupcake is also known as the "death to all diets" but they say it's all about moderation. Therefore, have your cupcake and engulf it too :)
Reese's Pieces Cupcakes
1 package devil's food cake mix
1 (5.9 oz) package instant chocolate pudding mix
1 cup sour cream
1 cup vegetable oil
4 eggs, lightly beaten
2 tsp vanilla
1/2 cup water
Peanut butter Buttercream Frosting:
3 sticks butter, softened
1 cup creamy peanut butter
2 Tbsp vanilla
2 lbs. confectioner's sugar, sifted
6-8 Tbsp. heavy cream (if using milk, amount will be less)
*I used milk, can't remember how much but I just added it until I got the consistency I wanted. It might have been about 3 tablespoons.
NOTE ABOUT FROSTING: WILL MAKE A TON. THIS IS NOT A TEST.
I had so much frosting left over that I made a whole 'nother batch the very next day and took all 24 new cupcakes to work. Moral of the story: halve the frosting recipe :)
1. Preheat oven to 350 degrees. Line muffin tin with liners or spray with cooking spray.
2. In large bowl, beat together cake and pudding mixes, sour cream, oil, eggs, vanilla, and water. Beat for two minutes on medium speed until well combined.
3. Distribute batter evenly between muffin tins (mine made 27 cupcakes total), about 3 tablespoons of batter per muffin well.
4. Bake for 18-22 minutes or until top of cupcakes spring back when lightly touched. Allow cupcakes to cool inside muffin tins for about 10 minutes.
5. Remove cupcakes and allow to fully cool on wire rack before frosting.
For frosting:
1. Cream butter and peanut butter on medium speed until fluffy. Turn mixer to low and slowly add in confectioner's sugar, continuing to mix until well blended.
2. Add vanilla and milk. Blend on low until moistened. Add additional milk if needed until you reach the desired consistency. Beat at high speed until frosting is smooth and fluffy.
I apologize for the low quality of this photo, and the subsequent lack of phots of the following meals. My poor camera has reached the end of it's time with me. R.I.P. Sony.

Crockpot Tamale Pie
Cornbread topping:
3/4 cup cornmeal
1 1/4 cup flour
1 cup milk
1/4 cup sugar
1 egg
1 tsp baking powder
Tamale filling:
1 can drained and rinsed black beans
1 can fire roasted tomatoes (I used a can of Rotel)
1 can drained corn
1 Tbsp chili powder
1 tsp cumin
1/2 tsp paprika
1/4 cup diced onion
1/2 cup shredded cheese
**You can add browned meat of your choice if you so desire. I was in a hurry before work so I omitted it and you really didn't miss it!
1. Spray crockpot with cooking spray.
2. Add in filling ingredients (including cheese) and stir well to distribute spices.
3. In a separate bowl, combine ingredients for cornbread topping.
4. Pour batter over filling, spreading with a spatula.
5. Cover and cook on low for 4-7 hours or on high for 2-4.
Sad story about the cook time: I turned it on before I left for work and just happened to get off late that day. The edges of my poor tamale pie were burned black!! And the rest of the cornbread topping was a little darker than I would have preferred. But we made do and just add from the middle outward. On her blog, the woman said hers was ready at hour 6 so I would definitely NOT recommend cooking it for 8 and a half hours!! But oh man, tougher cornbread texture aside this meal was SO good and SO easy!! We are going to have it again on a weekend when I can better control the cook time.
The Lord provided us with a nice little taste of cold fall weather this week so we were definitely in the mood for warm food. I got this recipe off of Pinterest as well, originally from howto-simplify.com. When they say simple they mean it! So easy to prepare and so flavorful. I took the leftovers to work and was in heaven...could even ignore the havoc that was being wrecked by the small children surrounding me. Actually I had to fend for my chili as they all wanted to stir it for me haha!
White Chicken Chili
1 Tbsp. olive oil
1 medium onion, diced
2 c. cooked chicken, shredded
2 cans Great Northern beans, drained and rinsed
1 can corn, drained
1 can (4 oz.) green chilies
1/2 tsp. cumin
1/2 tsp. oregano
1 box (32 oz.) chicken broth
Salt and pepper to taste
Juice from 1 lime
1. In large pot, saute the onion in olive oil.
2. Add chicken, beans, corn, green chilies (with juice from can), cumin, and oregano. Stir to combine, then add chicken broth.
3. Bring to a boil and simmer 20-30 minutes to allow broth to reduce. Add salt, pepper, and lime juice.
4. Top with sour cream, cilantro, cheese, avocado, or tortilla chips.
I chose to top ours with a tiny bit of sour cream mixed in, shredded cheese, crushed tortilla chips, and a very light sprinkle of chili powder. O.M.G. Such a yummy comfort food with just the right amount of spice. Y'all have to try this one!! It will be a keeper I guarantee :)
Monday, October 17, 2011
Taste and See!
Psalm 34:8-10 "Taste and see that the Lord is good; blessed is the man who takes refuge in him. Fear the Lord, you his saints, for those who fear him lack nothing. The lions may grow weak and hungry, but those who seek the Lord lack no good thing." We serve such a good God! There are some days when I am just astounded and amazed by His goodness. I mean, the very fact that we get another day on this earth is a testament to His goodness! And what a promise - that if we seek His face, we will lack no good thing. He so yearns to pour out blessings and every good thing on His children. All we have to do is turn to Him and open our hearts. And if there seems to be lions at your door or around every corner, don't worry! Because they, unlike us, will grow weak and hungry! Amen to that!
So I am so happy to say that I finally reached week 9 of Couch to 5K! I must say, I would have thought that Clarisse would show a little more enthusiasm. She was just "You've made some progress (said with a long O sound) over the last few weeks". Uhhh you think?? Of course, I only listened to her introduction to make sure I was supposed to run for 30 minutes, then switched over to Forrest Gump at the gym instead of her strange compilation of musical items. Forrest and I actually "just started runn-an" together (please read that in a Forrest Gump accent), which made the time fly by. I cannot believe and would have never guessed that I would actually get to the end of this program! I don't have a very good track record at keeping at things...softball...soccer... If you have started KEEP GOING! YOU CAN DO IT!
We tried several new Mexican recipes this week and both were absolutely delicious. I found both on one of my most frequently visited blogs "Pearls, Handcuffs, and Happy Hour". I highly recommend both those and the couple recipes to follow! You can't go wrong with any of them this week!
Mexican Casserole Tostadas
2-3 chicken breasts, cut into bite-sized pieces
1-2 tsp cumin
1/2 yellow onion, chopped
1 red bell pepper, chopped (I omitted since I didn't have it on hand and those red ones are expensive! Preschool teacher budget rules the grocery list)
1 green bell pepper, chopped
1 can black beans, drained
1 1/2 cups salsa
4 oz. cream cheese
2 tomatoes, chopped (I omitted...not a fan)
1/2 - 1 cup shredded cheese
Corn tortillas for tostadas
Oil for frying
1. Spray large skillet with cooking spray. Cut chicken into bite-sized pieces and add to skillet with onion and cumin. Saute until chicken is cooked.
2. When chicken is cooked, add bell peppers and saute for 2 minutes.
3. Add salsa and cook for 2 minutes.
4. Add cream cheese and stir until melted.
5. Add black beans and tomatoes, stir well, and transfer to 8x8 baking dish.
6. Bake at 350 degrees for 15 minutes. Remove from oven, top with cheese, and return to oven for an additional 5 minutes.
This dish is so delicious and versatile you can literally put it with anything (rice, tortilla, chips, etc.) I tried out making my own tostadas (uhh who knew it was so easy and why have I not been doing this my whole life??) Just heat some oil in the bottom of a skillet, pop those corn tortillas in, and turn when golden and crispy. Don't forget to poke some holes in them before frying and drain excess oil off on a paper towel. Scoop a big ol' helping of the casserole onto each tostada and enjoy!!

Chicken Enchilada Pasta (and so much more!)
This recipe is seriously the best bang for your buck. I made it as it was originally intended, as a pasta sauce, and ended up with about a gallon of leftover sauce. I ended up taking it to work one day as a tortilla soup (just added some black beans and topped with crushed chips) since it already has chicken in it. Then I used it another day as enchilada filling (added black beans, roll it up in a tortilla, oh yum). If you want something to stretch for all kinds of meals, this is the one for you!
2-3chicken breasts, cooked and shredded
2 Tbsp. oil
2 garlic cloves, minced
1 medium onion, diced
1 red bell pepper, diced (I used green again)
1 4-oz. can green chiles
1/2 tsp. salt
2 tsp. chili powder
1 tsp. cumin
2 10-oz. green enchilada sauce
2/3 cup red enchilada sauce
2 cups shredded cheese
1 cup sour cream
Penne pasta
1. Cook chicken and shred. Boil pasta according to pasta and chop all veggies.
2. Heat oil in skillet and cook onions for 3-5 minutes. Add garlic and peppers and cook another 3-5 minutes.
3. Add cooked chicken, green chiles, cumin, chili powder, salt, and enchilada sauces. Simmer for 8-10 minutes.
4. Add cheese and stir until melted. Add sour cream and cook on LOW until well mixed throughout.
5. Drain pasta, return to pot, and pour sauce over noodles.

Seriously, you have to try it!!! Mexican flavor with pasta....my two favorite things in the world!
We've been talking about fall the past couple weeks at the preschool....although these poor Texan children are seriously deprived of any fall colors outside. Since we've been exploring apples, pumpkins, gourds, and the like, on Friday we made homemade applesauce! So easy and made the room smell delicious!
Homemade Applesauce
8 red apples
1/2 cup sugar
1 cup water
1 tsp. cinnamon
1. Peel, core and cut apples into bite-sized pieces. This is the most time-consuming part...everything else is a breeze!
2. Add apples, sugar, water, and cinnamon to crockpot. Cook on high for 2-3 hours.
3. When apples become soft, mash using a potato masher.
4. After the first few hours, reduce heat to low and cook for another 2-3 hours.
5. Mash periodically until you get your desired consistency. Add more sugar if desired.
I believe I ate more than all my kids did combined! Except my little cowboy who would just walk over and help himself to more...and was surprisingly good at wielding the giant ladle! Of course I had two picky ones that wouldn't even try it, despite how excited they were as they helped me prepare it, simply because it was a darker color than store bought applesauce. Seriously kids?? Its apples, sugar, and cinnamon...there is nothing in there that you don't like. I really had to fight the urge to ban them from leaving the table until they tried one bite like my mom used to do and I will do with my own kids. The argument "you don't know if you like it unless you try it" had no effect on these pickies. I used all sorts of method of persuasion to attempt to get them to try one teeny-tiny bite but once the whining and brink of tears came, I surrendered. Their loss means more for Mrs. Sawah!
So I just thought I'd share a really easy way to make a super fast and super yummy meal. Many of you probably know this trick already but I'm still going to share it with those who may have been like me for most of my life and had zero kitchen sense (what do you mean you have to turn on the burner to make a grilled cheese? Ohhhh I accidentally turned on the fan...whoops.) So a staple in our place is a jar of alfredo sauce. I know many have reservations about jarred alfredo but the Classico Four Cheese is actually pretty good. Normally I make my chicken, boil my pasta, toss it in with a nice helping of sauce (don't even bother heating it up), add some pepper, Italian seasoning and cheese and we're good to go. Well this time I thought I'd try to put a tiny bit of effort into it and oh my goodness what a difference it made...yet still took no time at all! First I sauteed some green onion and garlic in olive oil until I could start to smell the garlic and the onions were becoming transparent. Then I added the sauce to the pan and thinned it out with a splash of chicken stock. Let it simmer. To the linguine I added zucchini ribbons (saw this on Rachael Ray one time and was intrigued.) Peel your zucchini with a vegetable peeler and make long "ribbons". Pop those in with your pasta for the last 4 or so minutes of cook time. I normally just cut up zucchini or squash to add to the pasta but this looked so much prettier and was easy to twirl on your fork with the long pasta strands. Drain the pasta and zucchini, pour doctored sauce over everything, top with Italian seasoning (we like alot of it in our household) and lots of cheese. I swear, the garlic, onions, and chicken stock make all the difference in the world!! I'm never plopping the sauce in the pot and calling it good again.....well, I say that now....
Don't let the name fool you ...and don't think of old people creamed corn!! I got this recipe from Rachael Ray's website and for some reason was just drawn to it. We tried it out last night and oh my goodness....so tasty! The sauce was very light and buttery, leaving us full but not miserable like many cream sauces can do. So good and so easy to make...the only effort you put in is chopping up some veggies! I halved it and had just the right amount leftover to take to work tomorrow. This is the un-halved recipe:
6 ears of corn on the cob, husked (or 3 cups thawed frozen corn or canned corn)
2 Tbsp. extra virgin olive oil
1/4 pound pancetta or lean, center-cut bacon (I used Great Value bacon...surprise surprise)
1 Fresno chili pepper, seeded and finely chopped OR 1/2 small red bell pepper, finely chopped
2 Tbsp. thyme, finely chopped (I used dried)
1 small red onion, very finely chopped
3-4 cloves garlic, finely chopped
1 cup shelled fava beans (or defrosted shelled edamame or lima beans...I used the latter)
1/2 cup dry white wine or chicken stock
3 Tbsp. butter
1 pound egg tagliatelle or other wide-cut pasta
1/2 cup flat leaf parsley, finely chopped (I had plans to use dried....just realized I completely forgot it ha!)
Grated Parmigiano Reggiano or Pecorino Romano cheese, for topping (Or if you are like me....GreatVal Italian blend shredded cheese for $2!)
1. Into large bowl, scrape corn off of cobs, as well as cobs themselves, catching juices. Or open up a can of sweet corn and keep a little bit of the juice.
2. Heat a large skillet over medium heat and bring large pot of water to boil for the pasta.
3. Add olive oil to the hot skillet and add bacon. Cook to render the fat and crisp, 3-4 minutes.
4. Add corn and juices and cook for 3-4 minutes. Salt and pepper to taste.
5. Add the peppers, onions, and garlic; stir for 5 minutes.
6. Add fava beans/edamame/lima beans and deglaze pan with chicken stock or wine.
7. Stir in butter and reduce heat to low. (I might have added a little extra butter)
8. Salt boiling water and boil pasta according to package directions. Add 1 cup of starchy cooking water to corn mix (next time I'd add less than that. I ended up draining some excess liquid from the leftovers).
9. Drain pasta, toss with corn, top with parsley and cheese.

Taste and see :)
Monday, October 3, 2011
To All Who Can Wield A Can Opener
Colossians 3:23-24 "Whatever you do, work at it with all your heart, as working for the Lord, not for men, since you know that you will receive an inheritance from the Lord as a reward. It is the Lord Christ you are serving." This completely changes how I view my daily life, especially work! We all have days when we just really do not feel like doing whatever we need to (or have to) do. Just this morning it was (almost) impossible to get out of bed without the assistance of a small bulldozer. We must change our mindset, and remind ourselves of this new mindset throughout the day, to one in which we work for the Lord, not for the approval of people around us. When we strive for perfection for those around us, we will without a doubt fail. But the Lord constantly loves us like crazy and when we work for Him, our relationship is strengthened and blessed even more!
Well, after taking Monday off to continue the recuperation process, I was finally able to walk farther than from the bedroom to the couch without requiring a resting period. I was extremely thankful for my crock pot (which sounds so incredibly house-wifey but I don't care....it was true!) and made some yummy feeling sick/needing comfort food for James and myself. Poor guy, he was also feeling under the weather with a sore throat. It was not a good week in terms of health in the Sebesta household last week. Comfort dish numero uno: chicken tortilla soup! This delicious and so-easy-it's-almost-embarassing soup doesn't actually have tortillas so the name still remains one of the greatest mysteries of this day and age.
To accompany our soup, and since the only work required was operating a can opener, I was craving some cornbread. Because getting behind the wheel to go get some fabulously inexpensive and beloved Jiffy was out of the question, and because I happened to have some yellow cornmeal on hand, I decided to try making my own. I just googled recipes and found this awesome one from Food Network's The Neelys. Although this couple personally annoys me to no end (I'm sorry if you are a fan) - I mean really, what couple is that lovey-dovey in the kitchen?? I find myself gagging slightly at the ooey-gooey things they say over simple things ("Alright baby now I'm just gonna go over here and slice these zucchini" "You're gonna slice them?!!!" "Oh yeah, baby I'm gonna slice 'em" "Oh look at you go, mmm mmm mm those are gonna be so good!" "Oh baby I just can't wait"). When I cook and have 3 things going at once and am profusely sweating over the kiln we call an oven, James will come in and attempt to give me a hug. Let's just say my response is not very Neely-like. Sorry, that was a long side note. Personal differences aside, they have a fabulous recipe for some honey cornbread muffins! You can taste just the right amount of honey (and butter) in each bite. My stomach was still a little off after the flu bug and lucky for me, these muffins were one of the few things that sounded and tasted delicious :)

I managed to get back to work on Tuesday and was greeted by some very excited, very energetic little people. One of my girls asked if I was feeling better in a very concerned, very grown-up voice...so sweet! After making colored pasta collages in the morning as part of a unit about how God gives us all things we need, like food - especially yummy carbs like pasta - and cutting cooked noodles to practice scissor skills in the afternoon, needless to say I was craving some comforting pasta at the end of a very long day. Comfort dish numero dos: mainstay macaroni! I've posted the recipe before so just click on the name and it'll take you back to the page:

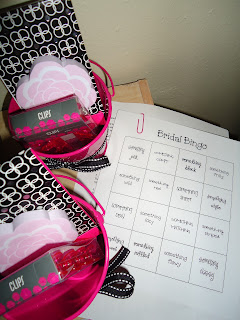

Before I allowed my sister to open her gifts Saturday night, I had a few questions to ask her. I had previously emailed her fiance these questions, got his responses, and quizzed her to see if their answers matched. I got the idea from one of my friends' showers and it actually is so much fun! I asked questions such as "If you could throw away one thing from her closet, what would you pick?" followed by "What would she throw away from your closet?" as well as questions about favorite athlete by first and last name, first date, favorite dessert, etc. Throughout the gift-opening the girls played bridal bingo (a bingo card with things like "something white", "something matching", "something wild", and so on) for the chance to win a fabulous prize! As my sister opened gifts, I secretly wrote down phrases she said and shared them with the group at the end as things she will say on her wedding night. Oh my goodness, it was so hard not to laugh as she said priceless things. The top ones were: "It was gently used by a large woman before you", "Tracy can make magic happen", and "Sorry for the funny smell". We were rolling on the floor in our tears!
Grandma Mary Jane's Sugar Cookies


Well, after taking Monday off to continue the recuperation process, I was finally able to walk farther than from the bedroom to the couch without requiring a resting period. I was extremely thankful for my crock pot (which sounds so incredibly house-wifey but I don't care....it was true!) and made some yummy feeling sick/needing comfort food for James and myself. Poor guy, he was also feeling under the weather with a sore throat. It was not a good week in terms of health in the Sebesta household last week. Comfort dish numero uno: chicken tortilla soup! This delicious and so-easy-it's-almost-embarassing soup doesn't actually have tortillas so the name still remains one of the greatest mysteries of this day and age.
Chicken Tortilla Soup
4 chicken breasts
2 15-oz. cans black beans, undrained
2 15-oz. cans of Mexican stewed tomatoes or Rotel (or 1 of each)
1 cup salsa
4 oz. can chopped green chilies
14.5 oz. can tomato sauce
Tortilla chips
Shredded cheese
1. Combine all ingredients except for chips and cheese in crock pot.
2. Cover and cook on low for 8 hours.
3. Just before serving, take out chicken and slice into bite-size pieces. Stir back into soup.
4. Top with crunched-up chips and cheese.
Yum!
This stuff reheats so well which just makes it even better when your recuperation process takes a couple days. Thank you Lord for comfort food:)


To accompany our soup, and since the only work required was operating a can opener, I was craving some cornbread. Because getting behind the wheel to go get some fabulously inexpensive and beloved Jiffy was out of the question, and because I happened to have some yellow cornmeal on hand, I decided to try making my own. I just googled recipes and found this awesome one from Food Network's The Neelys. Although this couple personally annoys me to no end (I'm sorry if you are a fan) - I mean really, what couple is that lovey-dovey in the kitchen?? I find myself gagging slightly at the ooey-gooey things they say over simple things ("Alright baby now I'm just gonna go over here and slice these zucchini" "You're gonna slice them?!!!" "Oh yeah, baby I'm gonna slice 'em" "Oh look at you go, mmm mmm mm those are gonna be so good!" "Oh baby I just can't wait"). When I cook and have 3 things going at once and am profusely sweating over the kiln we call an oven, James will come in and attempt to give me a hug. Let's just say my response is not very Neely-like. Sorry, that was a long side note. Personal differences aside, they have a fabulous recipe for some honey cornbread muffins! You can taste just the right amount of honey (and butter) in each bite. My stomach was still a little off after the flu bug and lucky for me, these muffins were one of the few things that sounded and tasted delicious :)
Honey Cornbread Muffins
1 cup yellow cornmeal
1 cup flour
1 Tbsp. baking powder
1/2 cup sugar
1 tsp. salt
1 cup whole milk
(I just had 1% in the fridge and they came out great...plus saved a few calories)
2 large eggs
1/2 stick butter, melted
1/4 cup honey
1. Preheat oven to 400 degrees.
2. Mix cornmeal, flour, baking powder, sugar, and salt.
3. In another bowl, whisk together milk, eggs, butter, and honey.
4. Add wet ingredients to dry ingredients and stir until just mixed.
5. Line muffin tin with paper liners (or just spray it with cooking spray), divide batter evenly, and bake for 15 minutes until golden.
Make these - you will love them!!!

As I finally get back into my normal routine, I thought I'd just briefly tell you about our lunch routine at school. After getting the kids' hands all washed and seated at the table, which is a whirlwind in itself, we always say a prayer. I vary between having the kids say one and having them repeat my words. My prayers always contain pleas such as "Help us be nice to our friends", "Help us share", or "Help us use our gentle hands", especially on days when those three behaviors are especially absent. But no matter if I pray or if one of the kids prays, one of my girls adds "and take care of our school" (one of our classroom guidelines) and one of my main little men adds "and help the fire alarm not go off" (in reference to the day when the alarm went off ALL. DAY. LONG. and loud noises were particularly upsetting to this little guy). Every single time. Morning snack. Lunch. Afternoon snack. Hey, a good lesson in learning that we can pray to God about the smallest things, even fire alarms. After the prayer there is a rush of activity opening lunch boxes, opening juice straws, etc. Then I get my way-cool boy's lunch box and have a seat on our carpet to enjoy my lunch alongside the kids. Without fail, literally every single day, they ask me, "What do you have for lunch?". I tell them. "Do you have an apple today?" If the answer is yes, "Is it real?" Why yes, yes it is. So cute!
This weekend my mom and I hosted a lingerie shower for my sister who is getting married next May. My parents have a beautiful lake house on Lake Travis and the weekend was just perfect.....perfect weather, tons of girl talk, yummy food, even yummier drinks, boat rides, martini glass-etching craft, and some shower games (details to follow). I offered to bring the desserts and had so much fun making lots of hot pink and black decor. James thought I was absolutely insane as I was surrounded by scrapbook paper, hot glue guns, and ribbons galore. Here's a little view of what I made:


Before I allowed my sister to open her gifts Saturday night, I had a few questions to ask her. I had previously emailed her fiance these questions, got his responses, and quizzed her to see if their answers matched. I got the idea from one of my friends' showers and it actually is so much fun! I asked questions such as "If you could throw away one thing from her closet, what would you pick?" followed by "What would she throw away from your closet?" as well as questions about favorite athlete by first and last name, first date, favorite dessert, etc. Throughout the gift-opening the girls played bridal bingo (a bingo card with things like "something white", "something matching", "something wild", and so on) for the chance to win a fabulous prize! As my sister opened gifts, I secretly wrote down phrases she said and shared them with the group at the end as things she will say on her wedding night. Oh my goodness, it was so hard not to laugh as she said priceless things. The top ones were: "It was gently used by a large woman before you", "Tracy can make magic happen", and "Sorry for the funny smell". We were rolling on the floor in our tears!
For the desserts, I made two types of cupcakes and some of my grandma's sugar cookies. They were seriously insanely addicting. I think I might still be coming off of my sugar high :) They even got my very, naturally-healthy (aka weird) dad to eat a whole one! I will definitely be making them again! I got both cupcake recipes from a blog I love (Une-deux senses).
Mint Chocolate Cupcakes
Cupcake:
1 box of chocolate Devil's food cake
1 box of Andes mints, finely chopped (I used half a cup of Andes mints baking chips)
5 Thin Mint cookies, finely chopped
1/4 tsp. mint extract
1. Make cake batter according to the directions on the box.
2. Add the Andes mints and thin mints to the batter.
3. Add the extract and mix well.
4. Divide the batter among a cupcake pan lined with liners.
5. Bake at 350 degrees for 15 minutes or until a toothpick inserted into the center comes out clean.
6. Let cool completely before frosting.
Mint Cream Cheese Frosting:
4 oz. cream cheese, room temperature
4 Tbsp. butter, room temperature
1/4 tsp. of mint extract
1 1/2 cups powdered sugar
1-2 drops green food coloring (I went slightly overboard and it kinda reminded me of toothpaste haha)
1. Using an electric mixer, whip the butter and cream cheese until smooth and creamy.
2. Add the mint extract, then the powdered sugar, 1/2 cup at a time, until well combined.
3. Add the food coloring to your preference.
 |
| Toothpaste-look aside, these are hands-down the moistest cupcakes I have ever had!!! |
Chocolate Chip Cookie Cupcakes
These seriously blew my mind. They literally taste exactly like a chocolate chip cookie but in an incredibly fluffy cupcake!
Brown sugar cupcakes:
1 1/2 sticks unsalted butter, room temperature
3/4 cup light brown sugar, packed
2 large eggs
1 1/3 cups flour
1/2 tsp. baking powder
1/2 tsp. baking soda
1/8 tsp. salt
1/2 cup milk
1 tsp. vanilla
1/2 cup semisweet chocolate chips
1. Preheat oven to 350.
2. Combine butter and brown sugar in a stand mixer fitted with a paddle attachment and beat on medium-high until light and fluffy.
(I only have a hand mixer and it worked just fine!)
3. Mix in eggs, one at a time, beating well after each addition.
4. Combine the flour, baking powder, baking soda and salt in medium bowl, stir to blend.
5. Add the dry ingredients to the mixer bowl on low speed, alternating with the milk, beginning and ending with the dry ingredients. Mix each addition until just incorporated.
6. Blend in vanilla.
7. Fold in chocolate chips with a spatula.
8. Divide the batter evenly among cupcake pan lined with liners and bake for 18-20 minutes or until toothpick test comes out clean.
Cookie dough frosting:
1 1/2 sticks unsalted butter
1/4 + 1/8 cup light brown sugar
1 3/4 cups powdered sugar
1/2 cup flour
large pinch of salt
1 1/2 Tbsp. milk
2 1/2 tsp. vanilla
1. Beat together butter and brown sugar until creamy.
2. Mix in the powdered sugar until smooth.
3. Beat in flour and salt.
4. Mix in milk and vanilla until smooth and well blended.
 |
| $9.99 Frosting gun from Target.....you are my hero!!! |
1 1/2 cups powdered sugar, sifted
1 cup butter, softened
1 egg
1 tsp. vanilla
1/2 tsp. almond extract
2 1/2 cups flour
1 tsp. baking soda
1 tsp. cream of tartar
1. Mix sugar and butter.
2. Add egg, vanilla, and almond extract. Mix thoroughly.
3. Sift dry ingredients together and blend in.
4. Cover with saran wrap and refrigerate 2-3 hours.
5. Heat oven to 375.
6. Divide dough in half and roll 1/4 inch think on lightly floured pastry cloth.
7. Cut with cookie cutter, sprinkle with sugar if not frosting.
8. Place on lightly greased cookie sheet and bake for 7-8 minutes until delicately golden.
Frosting:
5 Tbsp. butter, softened
3 cups powdered sugar, sifted
3 Tbsp. cream or milk
1 1/2 tsp. vanilla
1. Blend butter and sugar.
2. Stir in cream and vanilla.


 |
| A look at the whole spread! |
Monday, August 15, 2011
Those who hope in the Lord!
Isaiah 40:31: "But those who hope in the Lord will renew their strength. They will soar on wings like eagles; they will run and not grow weary, they will walk and not be faint." Who needs coffee, Red Bull, or any other source of caffeine when we have the Lord Almighty behind us, supporting us, and making us soar on wings without growing weary! He truly is an awesome God and renews our strength if we rely on him as our source. Some may wonder why they are so very tired and weary of life if the Bible presents a promise such as this. It might be time to ask if what you are devoting your time and energy is aligned with God. Are we really doing what God has envisioned and desires for us and our lives if what we do on a day-to-day basis leaves us feeling weary and disheartened? (Disclaimer...as a teacher, I am most definitely weary by the end of the day but it is a physical weariness. There is a weariness of a different kind that I have experienced before that is a spiritual and emotional tiredness.) Focus on God and let Him renew your strength. Hope in Him....He knows what He is doing!!!
So this weekend was a monumental couple of days! We went up to Fort Worth, TX to help my sister-in-law (how fun is it to call her that?!) move in to her freshman dorm room. I sound like an older person (in order to avoid offending some of my readers "old" in this case refers to anyone 70 and older) but seriously...where has the time gone??? She was in eighth grade when my husband and I met and started dating, now she's a college girl!! With the cutest dorm room, of course. But moving her in brought up all those college memories that are not very far away considering I graduated only 3 months ago but I shall embrace the nostalgia nonetheless. I thought about two definite things that college taught me, other than the academics of course:)
1. God puts people in our lives at certain times for certain reasons.
When I went off to college I left not only my close group of friends and family, but also my boyfriend and the state I was born and raised in! But God had different plans for me and knew exactly what He was doing. I went potluck for my freshman roommate and.....ended up living with her for all four years of college! It is slightly creepy how much we got along from the very beginning and it is hard to put our relationship into words (haha!) but it is one that will literally last forever. Potluck? There was no luck about it. More like Godplan!
2. You truly can survive on peanut butter.
Lord knows I let the groceries run too low at the end of the month when money got tight and you're scraping the last bit of Jif onto a piece of almost-moldy bread, the butt of the loaf of course, not a nice soft-ish piece. But you slather that peanut butter on and you live to see another day! And that day involves PB&B (peanut butter and bread) for breakfast, lunch, and dinner.
As a little congratulations/good luck thing, I put together little goodie-gift bags for my sis-in-law and her new roommate. I found almost everything in the $1 section at Target (yet another reason to solidify my love relationship with Target, other than their adorable patterns on everything! Why'd you buy a plastic waffle fork? Well...it has a pattern you see...) I also made some peanut butter chocolate chip cookies with the recipe found on the back of Nestle Tollhouse pb&choc chips. It is such a good, simple recipe and makes the best homemade cookies! Here it is in case you don't want to read the back of a package...that font can be somewhat small at times :)


Nestle Toll House Peanut Butter & Milk Chocolate Chip Cookies
2 1/4 cups all purpose flour
1 tsp. baking soda
1 tsp. salt
1 cup (2 sticks) butter, softened
3/4 cup granulated sugar
3/4 cup packed brown sugar
1 tsp. vanilla extract
2 large eggs
1 2/3 cups (11-oz. pkg.) Nestle Toll House Peanut Butter & Milk Chocolate Morsels
1 cup chopped nuts
(I omitted the nuts)
1. Preheat oven to 375.
2. Combine flour, baking soda, and salt in small bowl.
3. Beat butter, granulated sugar, brown sugar, and vanilla extract in large mixer bowl until creamy.
4. Add eggs, one at a time, beating well after each addition.
5. Gradually, beat in flour mixture. Stir in morsels and nuts.
6. Drop by rounded tablespoon onto ungreased baking sheets. Bake for 9 to 11 minutes or until golden brown.
7. Cool on sheets for 2 minutes before removing to wire racks to cool completely.
Another huge, momentous event occurred this weekend....we finished the first four seasons of Mad Men last night! After doing some calculations we discovered we watched the equivalent of a work week of television in a very short amount of time. Unfortunately, we now have to wait until the season airs on TV this spring before continuing our addiction. I foresee some withdrawals in our near future.
To celebrate (or mourn) our completion of Mad Men, and therefore completing a very noble goal, we had a tasty Mexican night complete with chips, salsa, margaritas, and quesadillas. I thought I'd share the quesadilla recipe with you because the chicken truly made all the difference. I got this recipe from my mom who got it from my aunt. I first made the chicken in the crockpot before compiling my quesadillas.
Crockpot Shredded Chicken
4 boneless, skinless chicken breasts
Small jar of Pace picante sauce
(I didn't have any Pace so I scraped out the last of our salsa jars - about 1/2 cup total - and then supplemented it with some Rotel, with most of the juice)
1. Cook on low for 5-6 hours. Take out and shred, put back in the crockpot.
2. Add one packet of Old El Paso taco seasoning and 8 ounces of light sour cream.
3. Cook for another 30 minutes.
*If there is alot of liquid, spoon out before adding the shredded chicken back to the pot.
This chicken alone was to die for, so creamy and delish! I took it and turned it into....
Chicken-Bean-Veggie Quesadillas
I took the shredded chicken just described and layered it with refried beans (I would have used black beans but we already had some leftover from tacos the other night so I thought I'd be resourceful), shredded cheese, and sauteed veggies (I sliced zucchini and squash and sauteed them in some olive oil and pepper).
I piled all these yummy ingredients on one side of the tortilla, folded it over, and heated it in a skillet until nice and golden brown on each side. Slice with a pizza cutter into thirds to make cute and tasty mini quesadillas!


I had my first morning of Week 2 with Clarisse. As she so delicately put it, "I know this is difficult, but hopefully you built on the stamina you developed last week" or along those lines. Yeah, except that after my weekend full of bbq, bagels, burgers, and pizza, I'm pretty sure that stamina flew out the window with the aroma of my giant burger on a homemade bun dripping with bbq sauce and sitting next to a side of fries. But, the first of week 2 is done and crossed off the to-do list, and that is all that matters!!
Finally, yet ANOTHER monumental occasion...I had my first day of preschool today! It went fabulously. Children truly are a gift from God, even those ones whose behaviors are a little more "challenging". My kiddos are absolutely adorable!!! I just want to hug and squeeze 'em all day! This one precious little boy was looking at an I Spy book during nap time (this is the cutie with jeans, boots, a huge belt buckle, and a button down that had to be tucked in at all times) and came up to me, pointing to the picture on the cover. Here was our convo: "Miss Sarah (Sawah), is that a dinosaur?" "I think it might be a caterpillar. Do you think it is a caterpillar?" -it was most definitely a slimy-looking caterpillar crawling on a log- "I think it is a beta. They yook just yike that!" What kid knows the word "beta"? Major vocabulary points to you!
After my wonderful first day, I walked out to my car and realized....I locked my keys in my car. I locked my purse in on purpose but completely forgot that most people need keys to unlock the doors and operate a vehicle. So after attempting and failing to call James from the office (which was deserted all except for yours truly) I found a random pregnant lady in the hallway and bombarded her with my desperate plea to use her phone. Not exactly the way you wanted to end your day but everything worked out in the end! My husband picked me up, surprised me with an appetizer and wine cooler as soon as I walked in the door, and is now working hard in the kitchen to make a surprise dinner he planned for my first day! What a sweet man I married :) I'll let you know how his first independent kitchen adventure ends up! All I know is I'm not moving from this couch until dinner is on the table! I'll get my car later....for now, I hear some bubbly wine calling my name (yes...I make wine coolers out of cheap white and diet Sprite...deal with it).
Subscribe to:
Posts (Atom)